Handcrafted Instruments by Danny Molter
Guitar Blog Category
Dec
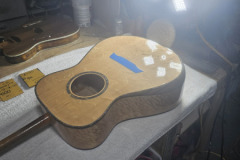
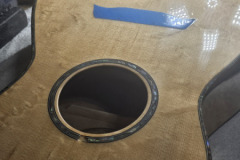
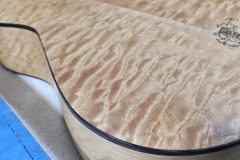
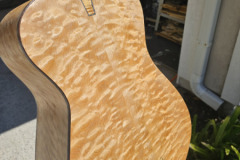
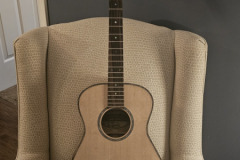
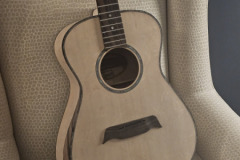
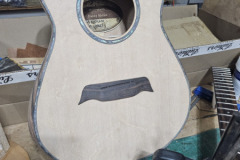
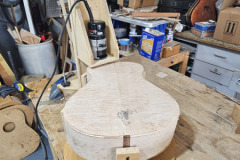
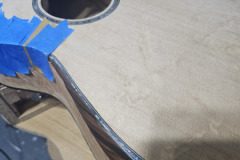
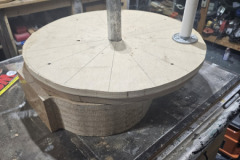
Well after the excruciating wait for the weather to clear up in Florida I finally finished the final coats of lacquer on Enrico. I waited 2 and a half weeks after the final coats to let the guitar off gas and harden enough to wet sand and buff, As you can see in the pictures I set up for wet sanding starting with 400 grit paper then progressing to 600, 800, 1000, 1200, 1500, 2000. I used a hand polisher to buff between grits up to 800. After sanding with 1000 I moved up to the big dog buffer. I have had this buffer for over 22 years and when I went to start it, the motor started to smoke and hum. I guess motors only last 22 years. Oh well luckily I had some extra motors hanging around and wired a new one up. Unfortunately the first one I wired was a 1.5 HP motor that rotated at 3600 rpms and it about flew of the mounts. Even luckier I had another motor that was just right. With all of that going on I have to say that the buffing process came out fantastic. The guitar finish really shows the incredible grain of the quilted maple and the awesome bearclaw sitka spruce top. I have glued the bridge on and installed the tuners. Next step is to string this baby up. Can’t wait but I’m sure Paul is more anxious than I am to get this guitar. It has been a struggle with this one and it has taken almost eight months to get to this point but I don’t want to sacrifice anything by rushing through this build. Enjoy the pics and look at the reflection in the top. “Beautiful”
- Posted in Guitar Blog by danny
- 0 Comments
Nov
I have completed all of the drop fills and level sanded the entire guitar. In the pictures you can see some of the “shiny” spots on the surface of the guitar. The purpose of a level sand is to knock off all of the shiny and get down to a level surface on the lacquer. Then the top coats (final coats) can be sprayed on the guitar. Unfortunately the weather has not cooperated with me to be able to spray them. It has been very cool and damp here in Florida and in those conditions I just can’t spray because it will trap moisture in the lacquer and will make it cloudy. Especially with the top coats you have to have favorable conditions to get the best results and put down some thick coats that will be able to buff to a high gloss. In the pictures you can see that the guitar has incredible figure that is highlighted by the lacquer. I have only level sanded this guitar with 320 grit sand paper and it looks amazing. Just imagine when I spray the top coats and start the wet sanding buffing process. I start with 400 grit wet sand and go all the way to 2000 grit while buffing between grits. Getting closer . Come on Weather.
- Posted in Guitar Blog by danny
- 0 Comments
Oct
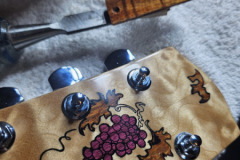
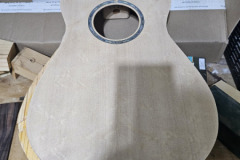
I am in the finishing stages of Enrico. I have completed all construction and have final sanded the guitar. I have included some pictures of the guitar somewhat put together before I sprayed it. Now I have sprayed 4 light coats on the guitar and you can really see the figure of the woods we selected for this build. The quilted maple back and sides really have some incredible figure. The top has great “Bearclaw” figure also. Don’t forget the 5 piece neck with curly maple, purpleheart, and quilted maple which looks awesome. I have to say my favorite is the headstock with the custom inlay of Paul’s logo. It has some very vibrant Purpleheart and Lacewood inlays that really pop. Next step will be to add several more coats of lacquer to build up the finish. I will level sand the guitar and will spray the top coats. After the top coats are applied I will let the guitar cure for about 2-3 weeks. After curing the wet sanding and buffing begins. After the buffing is complete I will glue on the bridge and start the completion process. Stringing up the guitar , leveling the fretboard and dressing the frets. Almost there!!!
- Posted in Guitar Blog by danny
- 0 Comments
Oct
Finally the construction of Enrico is complete. I had to redo the headstock because of a gluing failure. I think the second one came out much better. I have drilled the tuner holes and have glued on the macassar ebony heel cap. Now I will spend hours doing the final sanding and then my favorite part of luthierie which is spraying on the finiish. This is when all of the figure in the wood comes alive and you start to get a picture of what this guitar will look like. Here we go.
- Posted in Guitar Blog by danny
- 0 Comments
Sep
I am getting so close to finishing construction of Paul’s guitar. I have fretted the fingerboard and glued it to the neck. I have shaped the neck and removed everything that wasn’t guitar. As you can see from the pictures it creates such a mess when you use files and rasps to shape the neck but I really like the results going slow and deliberate. You can see how the 5 piece neck already shows some really nice figure even though I haven’t done a final sanding which will reveal the curly figure and even the quilted figure of the maple. I have cut the compensated saddle slot in the bridge and have located it. I also glued the headstock on the neck but unfortunately the overlay shifted when gluing and I was not satisfied with the result. I had to heat the headstock overlay off the neck and I will have to redo all of the inlays. This is a bummer but I did not want to settle for an inferior product. I have already glued a book-matched headstock overlay and will try to have the inlay completed very soon. When that is done and glued on the neck the guitar construction will be 99% complete. I will only have the heel cap left to glue on and to drill the holes for the tuning pegs. Then it is final sanding and getting ready for finish.
- Posted in Guitar Blog by danny
- 0 Comments
Sep
Paul’s guitar is now officially named “Enrico”. As you can see in the pictures I have inlaid Paul’s logo in the back and have added curly koa nose block and tail block extensions as well. I bent the Macassar Ebony bindings and cut the binding and purfling channels. I have installed the arm bevel veneer (Macassar Ebony) and have glued the bindings and pearloid/abolone purfling. Other than finishing the guitar this is the most tedious parts of the build. Getting everything installed in the correct orientation, depth, and width is a many step process. All in all everything came out beautifully. I really like the stark contrast of the Macassar Ebony against the Quilted Maple and Sitka spruce. This guitar will really pop. I hope it sounds as good as it will look.
- Posted in Guitar Blog by danny
- 0 Comments
Aug
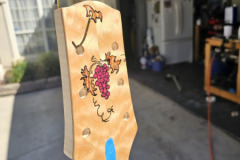
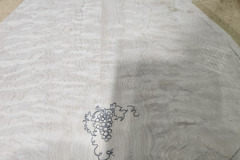
I have inlaid the headstock on Paul’s guitar. I have laser engraved the main image on a nice bookmatched piece of quilted maple. I used Purpleheart for the grapes and Lacewood for the leaves. I originally intended to use Abalone for the leaves but sometimes it doesn’t show up very well on maple. Instead I used lacewood which has a contrasting color against the maple and has alot of variegation in the grain. I think it came out very nice. I think I will also use lacewood for my logo as well. I am getting ready to make the first binding cuts as you can see the body in my binding jig. Getting closer to being a guitar.
- Posted in Guitar Blog by danny
- 0 Comments
Aug
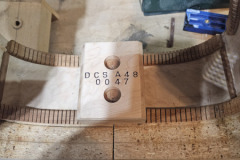
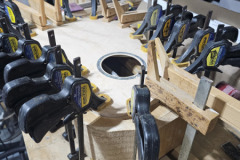
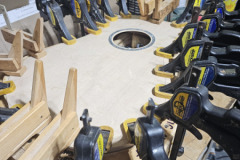
I have been preparing the top, back and sides for closing of the box. I have redone the engraved label for the guitar because I did not like how the original looked. I have stamped the noseblock with the model and serial number and have drilled the holes for the bolt on neck. I radiused the sides with a 25 ft. for the top and a 15 ft for the back, I glued the top on first and you can see how the bracing is integrated into the kerfing and arm bevel. I then glued the back on…. and now the fun begins. Now I have to cut the binding ledges and form the arm bevel and laminate it. After this is completed I will fit the neck to the guitar, however this should take a little while. I also have a picture of the headstock that has been engraved and I will be inlaying the purpleheart and abalone. It’s a big day.
- Posted in Guitar Blog by danny
- 0 Comments
Jul
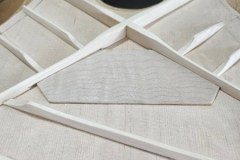
I forgot to post these pictures earlier and I just realized this after my last post. Anyway these pictures are of the curly Koa wedge that I installed. It also shows the mahogany Kerfing and side bracing installed. You can see the arm bevel installed and the cut on the sides that will be filed down at an angle and have a Macassar ebony veneer overlay. I am getting closer to gluing the top on this guitar after I shape the bevel on the top. After that I will glue the back and “close” the box.
- Posted in Guitar Blog by danny
- 0 Comments
Jul
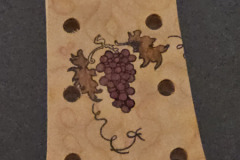
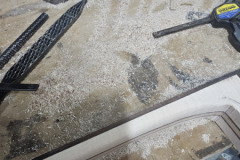
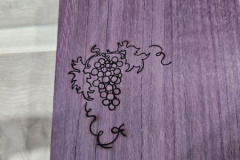
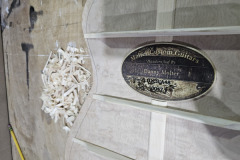
I have started to capture the custom image of Paul’s logo. This logo was painted by his sister for his business that he started in memory of his Father. The painting was in watercolors and I had to define the image to make it work for an inlay. I have sized it to where it will fit nicely on the headstock. In the pictures you can see that I engraved a piece of purpleheart on the laser and will use the outline to cut the inlay into the quilted maple headstock. I will also use the outline to inlay abalone for the leaves of this logo. I have engraved the same logo onto the back of the guitar. The other picture is of all of the shavings from the back braces that I shaped before the back gets glued to the sides. I have installed the engraved label to the back as well.
- Posted in Guitar Blog by danny
- 0 Comments

